Back to part 3 – making the replacement battery pack
Final testing of the replacement battery for the Cosy Thermostat
Health warning
Do not attempt this project unless you are competent, it involves soldering and other operations that can be hazardous. There are many places where this project can go wrong, do not attempt it unless you know what you are taking on. The author accepts no responsibility for any damage or injury caused by attempting a similar project.
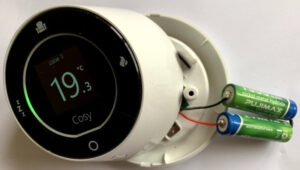
For testing, the new battery pack has been carefully plugged into the Cosy thermostat taking care not to short-circuit the battery because the soldered joints are still exposed. This shows that the new battery is working.
The final stage of making up the battery pack is to add a shrink wrap cover that will hold the cells and wires together and protect the soldered joins from coming into contact with other parts of the Cosy unit.
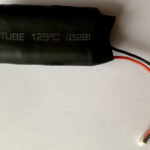
Finally, here’s a photo of the completed battery pack enclosed in thick shrink wrap. The shrink wrap is applied as a cylinder, rather like part of a bicycle inner tube, then heated with a hot air gun (a hair dryer is NOT suitable because it can not reach the required temperature). Care needs to be taken not to overheat the wires.
All that remains is to put the new battery pack into the Cosy thermostat, plug it into the circuit board and secure it in place, hot melt glue is one possibility for that.
The final installation could look like this . . .

